Как сделать кровать в сурвивал крафт
Обновлено: 17.05.2024
Эта страница рассказывает о виртуальных кнопках, которые используются во время игры в SurvivalCraft. Здесь вы узнаете как пользоваться GUI.
Есть три группы кнопок. Одни расположены по левому краю, другие по правому краю (возможно проходящие через верх), и кнопки управления персонажем снизу.
Остальная часть экрана используется для размещения или ломания блоков. Короткое нажатие будет ставить блок в этом месте. Если вы тапните по определённым предметам (например, по рачагу или кнопке) то это не ставит блок, а активирует этот предмет. Длинное нажатие начнет ломать блок к которому вы прикасаетесь.
Содержание
Левая часть экрана [ ]
Во время игры эта кнопка открывает Экран Паузы и приостанавливает игру, в отличии от всех других кнопок.
Обратите внимание, что после версии 1.27 из меню паузы можно выйти и в другие окна.
Есть 5 кнопок в меню Пауза: Settings (Настройки), Help (Помощь), Rate (Оценить) (если мир скачан из сообщества), Reset Adventure (Перезапустить Приключение) и Quit (Выход).
Rate (Оценить) [ ]
Settings (Настройки) [ ]
Открывает экран игровых настроек, который позволяет изменять множество настроек пользователей и игры.
Help (Помощь) [ ]
Quit (Выход) [ ]
В дополнение к указанным выше кнопкам, вы также можете найти информацию, отображаемую в верхней части экрана. Она говорит вам, какой в этом мире режим игры, как долго вы выживаете, сколько раз вы возрождались в этом мире и семя мира (сид), если это применено.
Если вы находитесь в творческом режиме, вам так же покажут ваши Тело (человечек) [ ]
Кнопка открывает окно персонажа, в котором есть две кнопки и два раздела: раздел тела/еды и раздел инвентаря. Чтобы закрыть это окно, вы должны снова нажать на кнопку тела.
Кнопки в этом окне:
Виртуальная статистика: [ ]
При нажатии на эту кнопку будут показываться ваш уровень здоровья, выносливости, продовольствия (голода), на сколько вы можете задерживать дыхание, тепло тела, влажность. Они показаны в . Другие статы Скорость движения и изоляции. Это связано с одежды и доспехи вы носите.
Кнопка череп и скрещенные кости, на экране может повредить вашему здоровью и убить вас, если вы держите нажатием. Это может быть использовано только, если вы каким-то образом застрял за помощью и хотите возродится на вашей последней точки сна.
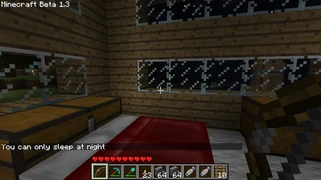
:: Эта кнопка сделает ваш персонаж сна, если условия правы. Т.е., вы должны быть устал достаточно, быть в удовлетворительном убежище и, стоя на достаточно мягкой блока.
==== 'кузова / Продукты питания Изображение' ====
Вы можете перетаскивать элементы из инвентаря на изображение тела. Это, как вы едите и положить одежду на. Одежда может быть возвращен в инвентарь, а также.
Это показывает свой инвентарь, так что вы можете перетаскивать элементы или из тела. Вы можете изменить свой инвентарь и здесь.
Открытие кнопку рукоделие даст вам экран 2x2 крафта. Это позволяет сделать некоторые простые вещи, включая таблицы крафта без использования Категории
Экранные кнопки/GUI
Кровать
Кровать (англ. Bed) — блок, который позволяет игроку пропустить ночное время до наступления утра. Последняя кровать, на которой спал игрок, становится точкой его возрождения после смерти в Верхнем мире..
Получение [ ]
Кровать можно добыть рукой или любым инструментом.
| Блок | Кровать | |
|---|---|---|
| Прочность | 0.2 | |
| Инструмент | ||
| Время разрушения [FN 1] | ||
| По умолчанию | 0.3 | |
| Деревянный | 0.15 | |
| Каменный | 0.1 | |
| Железный | 0.05 | |
| Алмазный | 0.05 | |
| Незеритовый | 0.05 | |
| Золотой | 0.05 | |
- ↑ Время для незачарованных инструментов, используемых игроком без наложенных эффектов, в секундах. Для большей информации см. Добывание § Скорость.
Крафт [ ]
Естественное появление [ ]
Красная кровать генерируется в иглу, а с версии 1.14 их можно встретить в деревенских домах. Кровать красная (Java и консольные издания)/белая (если сгенерирована в тундре), светло-синяя (если сгенерирована в замёрзшей или обычной реке) и коричневая (если сгенерирована в холодной тайге; только в Карманном издании).
Использование [ ]
Расположение [ ]
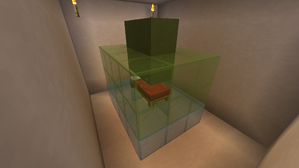
Кровать занимает пустое место 1×2 блока, поэтому, перед тем как поставить кровать, стоит убедиться, что перед вами есть такое же пустое пространство. Также нужно учитывать, что лечь на кровать не получится, если над ней вплотную расположен полный блок. При размещении кровати необязательно наличие 2 блоков под кроватью, а подушка всегда будет дальше, чем одеяло. Кровать может парить, если убрать под ней соответствующие блоки. При этом она будет висеть, и это никак не помешает спать на ней.
Высота кровати — 9 ⁄16 одного полноразмерного блока, то есть чуть выше половины блока. Таким образом, если ставить кровати друг на друга (с помощью приседания), то нижние кровати не будут заблокированными.
Чтобы лечь на кровать, нужно кликнуть по ней ПКМ . При этом должы быть выполнены следующие требования:
- Наличие грозы или ночи (заснуть можно, если текущее время находится в промежутке от 12542 до 23459).
- Игрок находится на расстоянии не больше 2 блоков от кровати (не больше 3 блоков для Bedrock Edition).
- В пределах 8 блоков горизонтально (оси X, Z) и 5 блоков вертикально (ось Y) от кровати нет монстров (необходимо только в Выживании). Среди монстров здесь понимаются все враждебные мобы, за исключением гастов, шалкеров и жестоких пиглинов. Из нейтральных мобов монстрами понимаются только пауки, пещерные пауки, странники Края и зомбифицированные пиглины.
- Кровать не должна быть заблокирована (над кроватью не должны быть вплотную расположенные полные блоки).
- Игрок находится в Верхнем мире.
- Кровать не занята жителем или другим игроком.
Если игрок попытается уснуть в Нижнем мире или в Крае, то кровать взорвётся (с силой 5) и подожжёт вокруг себя местность.
Если игрок попытается уснуть на кровати, занятой жителем, то он встанет с неё. Далее можно быстро нажать на кровать ещё раз и тем самым лечь быстрее жителя.
Если лечь на кровать с эффектом Отравления или под воздействием огня, то игрок почти сразу же встанет с кровати.
После того как игрок ляжет на кровать, он повернётся головой к подушке, откроется чат [ только для Java Edition ] или игрок может сам открыть чат [ только для Bedrock Edition ] ; экран начнёт темнеть и игрок не сможет двигаться. Во время засыпания игрок может встать с кровати, нажав на соответствующую кнопку. Потом, если игрок был в одиночной игре, он проснётся спустя 5.05 секунд утром в ясную погоду, встав возле кровати. Если же игрок был в многопользовательской игре, то он не заснёт и просто будет лежать на кровати, пока необходимое количество игроков (можно настраивать с помощью Игровых правил), находящиеся в Верхнем мире, не лягут спать.
Враждебные и нейтральные мобы могут разбудить игрока, нанеся ему урон. Игрок также пробуждается, если кровать была разрушена.
Сон на кровати не ускоряет никаких процессов, в том числе обжиг ресурсов в печи, исчезновение дропа, рост пшеницы и т. д.
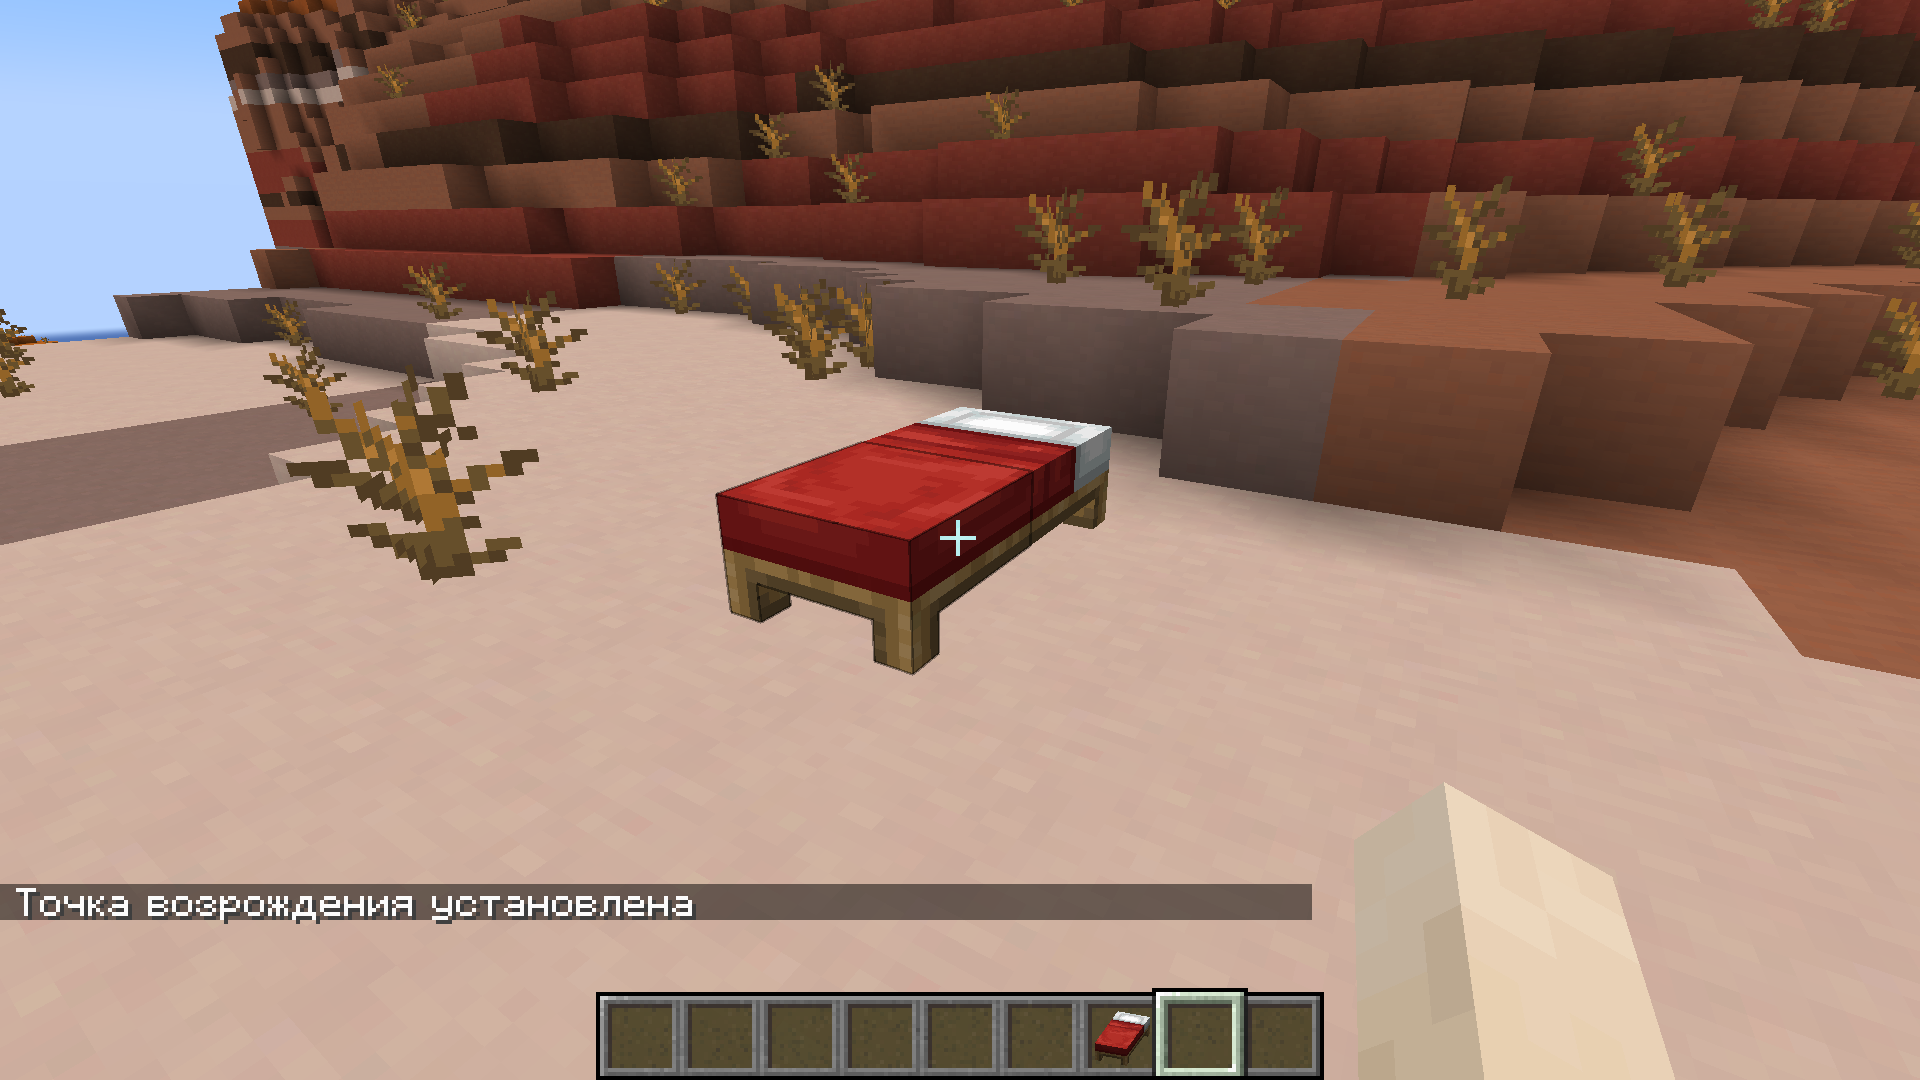
Точка возрождения [ ]
При первом клике по кровати ПКМ игрок установит свою точку возрождения рядом с ней, если она не заблокированна и не взорвётся после этого.
При гибели в Верхнем мире или в Крае игрок будет возрождаться рядом с кроватью. Это также справедливо для Нижнего мира, если там нет заряженного якоря возрождения. При этом должны быть выполнены следующие требования:
- Кровать, на которой установлена точка возрождения, не разрушена.
- Игрок имеет доступ к кровати, на которой установлена точка возрождения.
Голубым стеклом показаны блоки, хотя бы одно из которых должно быть твердым и полным в высоту, а зеленым стеклом блоки, хотя бы два в высоту из которых должны быть свободны и находится над выбранным голубым стеклом. Зеленой керамикой показаны блоки, хотя бы два в высоту из которых должны быть свободны, чтобы возродиться на кровати.
Доступ к кровати [ ]
Игрок имеет доступ к кровати, если одно из требований выполнено:
- Хотя бы один из блоков, составляющий прямоугольник 4x3, находящийся сразу под кроватью, имеет полную высоту и является твердым, а также 2 блока, находящиеся над этим блоком, являются свободными.
- Хотя бы 2 блока в высоту над кроватью свободны.
Если выполнено только 1-ое требование или оба — игрок возрождается на этом блоке. Если выполнено только 2-ое требование, то игрок возрождается на кровати.
Прыжки [ ]
При падении на кровать сущность отскакивает с силой примерно 25 % от силы падения, а урон при падении на кровать также равен примерно 25 % от обычного. Это свойство сохраняется, даже если на кровати кто-то спит.
Если в падении успеть лечь на кровать, то урон от падения засчитается только после пробуждения.
Жители [ ]
Жители также могут спать на кроватях. При этом их сон не пропускает ночь, а в Крае и Нижнем мире не вызывает взрыва.
Дети жителей иногда прыгают на кровати в течение дня.
Фантомы [ ]
Если включены соответствующие игровые правила, фантомы будут спауниться над игроком в небе в Верхнем мире, не спящим 3 игровых дня, и атаковать его.
Звуки [ ]
| Звук | Описание | Идентификатор | Громкость | Высота |
|---|---|---|---|---|
| ? | Разрушение блока | dig. wood | ? | 0.8 |
| ? | Падение на блок с уроном от падения | fall. wood | ? | ? |
| ? | Добывание блока | hit. wood | ? | 0.5 |
| ? | Прыжки с блока | jump. wood | ? | ? |
| ? | Падение на блок без урона от падения | land. wood | ? | ? |
| ? | Ходьба по блоку | step. wood | ? | ? |
| ? | Размещение блока | use. wood | ? | 0.8 |
Значения [ ]
| Название | Текстовый ID |
|---|---|
| Белая кровать | white_bed |
| Оранжевая кровать | orange_bed |
| Сиреневая кровать | magenta_bed |
| Светло-синяя кровать | light_blue_bed |
| Жёлтая кровать | yellow_bed |
| Лаймовая кровать | lime_bed |
| Розовая кровать | pink_bed |
| Серая кровать | gray_bed |
| Светло-серая кровать | light_gray_bed |
| Бирюзовая кровать | cyan_bed |
| Фиолетовая кровать | purple_bed |
| Синяя кровать | blue_bed |
| Коричневая кровать | brown_bed |
| Зелёная кровать | green_bed |
| Красная кровать | red_bed |
| Чёрная кровать | black_bed |
| Название | Текстовый ID | Числовой ID |
|---|---|---|
| Кровать (блок) | bed | 26 |
| Кровать (предмет) | 355 |
Состояния блока [ ]
| Название | Значение | Описание |
|---|---|---|
| facing | north south west east | Направление верхней части кровати. |
| occupied | true false | Если установлено значение true (истина), то игрок лежит на кровати. |
| part | head foot | Какая сторона кровати установлена на определённом блоке. |
Достижения [ ]
| Значок | Достижение | Описание | Предок | Задача (если отличается) | Идентификатор |
|---|---|---|---|---|---|
| Спи, моя радость, усни | Измените свою точку возрождения | Приключения | Поспите в кровати до рассвета. | minecraft:adventure/sleep_in_bed |
История [ ]
Проблемы [ ]
Отчёты об ошибках, связанных с «Кровать», поддерживаются в системе отслеживания ошибок Mojira. Сообщайте о найденных ошибках там (на английском языке).
Интересные факты [ ]
Если игрок лежит, то его модель в инвентаре тоже лежит.
Галерея [ ]
Текущие версии [ ]

Анимация, которая воспроизводится перед засыпанием игрока, находящегося на кровати в Java Edition


Взрыв после попытки поспать в Нижнем мире

Взрыв после попытки поспать в Крае


Кровати разных цветов в 1.12


Нищий житель спит на кровати
Старые версии [ ]
Некоторые функции, показанные на изображениях, были изменены или удалены в текущих версиях.

Анимация, которая воспроизводится перед засыпанием игрока, находящегося на кровати

Пробуждение игрока от присутствия моба, который находится вне закрытого помещения
Игрок не сможет использовать кровать даже ночью, если в комнате, где она находится, есть много окон
Как скрафтить кровать в survivalcraft
Всё что необходимо знать о фурнитуре в Survivalcraft 2. Если у вас остались вопросы, задайте их в комментарии и я .
ТОП 5 ЛАЙФХАКОВ В SURVIVALCRAFT 2 ДЛЯ НОВИЧКОВ В ВЫЖИВАНИИ, СОВЕТЫ ОТ ПРО В СЮРВЕ ДЛЯ НУБОВ :3 .
Эту идею я придумал сам!Так что вы можете уже увидеть такое видео,на просторах Ютуба.
Hey, guys! Back with another video. This time I'll be showing you guys how to build a full size bed. Hope this helps! If you guys .
Crafting
Crafting is essential to survival. All tools, weapons and most building materials are made through crafting.
This page covers the general crafting process, not specific crafting recipes. All available recipes can be found in the recipaedia, through the in-game help. You can search for any individual item and its recipe on this wiki by using the SEARCH bar at the top of every page.
Crafting Process
The process for crafting is the same for either crafting area size. Most of the items you need will have to be made on the workbench, in the 3x3 area.
- Find the item you wish to craft in the recipaedia.
- Look at the materials needed and the pattern they have to be in. You must have all the materials in your inventory.
- Exit the recipaedia and return to gameplay.
- Open the crafting table or the handcrafting grid and place the specified materials in the pattern shown in the recipaedia.
- When the pattern is correct, your item will appear at the bottom of the crafting window. Drag the item into your inventory to accept it. You can rearrange all the materials at will before you remove the finished product.
- Close the crafting window by tapping the crafting button on the left of the screen. If you close the window before removing the finished product, all materials will stay in the crafting table or the personal crafting grid.
Contents
Furniture
Furniture blocks are sculpted from up to 16x16x16 smaller sub-blocks. Sub-blocks within a single furniture block can be made of different materials and painted to different colors. Through crafting, furniture blocks can be combined, made interactive or made to work with electricity. Furniture designs can be combined into packs, shared between worlds and uploaded to Community Content.
To design and create furniture use the hammer tool. You need to build the design from regular blocks in the world and then use the hammer on the resulting structure to shrink it down. Furniture design window will appear where you can tweak the design by moving it, rotating it and changing resolution (between 2x2x2 and 16x16x16). Once you are happy with the design, you can commit it.
In creative mode, the design will be turned into a single furniture block, and the source blocks from which the design was created will remain in the world. In survival modes, the design will be turned into several copies of the furniture block (with number depending on resolution) and the source blocks will be consumed. Furniture blocks can be placed in the world in 4 orientations, similar to e.g. a furnace or a ladder.
Not every block can be used for furniture design. For example, dirt or grass are ignored by the hammer tool. Allowed materials include: planks, granite, basalt, sand, clay, cobblestone, stone bricks, sandstone, marble, bricks, coal, malachite, diamond, copper, iron, glass, carpet, torches, wicker lamps, water, magma. Source blocks of the design can be painted or dyed to make the design more colorful. Finished furniture can also be painted, this will cover any colors of the source blocks.
Certain source blocks have special functions. For example a torch/lamp block will cause the furniture to have a fire attached to it in the place of the block. The design will also emit light.
You have to be careful when constructing furniture to avoid placing the design on a base made of allowed material (for example sand). The hammer tool will not be able to distinguish between the blocks you placed and the base, and will try to incorporate base into design. This will likely cause "design too large" error, because the maximum size of a design in any dimension is 16 blocks.
Once the furniture block has been created, you can use crafting table to combine it with other blocks in various ways. The following combinations are possible:
- Combine multiple pieces of furniture into one to create interactive furniture. Interactive furniture toggles between its constituing designs on click or on electric signal. You can create opening doors, switchable lights, raising platforms etc. Up to 9 pieces of furniture can be combined (max capacity of crafting table).
- Combine exactly one furniture design with an electric button to create a custom button. The resulting furniture will act as a button.
- Combine exactly two furniture designs with an electric switch to create a custom switch. The resulting furniture will act as a switch, with two furniture pieces acting as two states of the switch.
- Combine multiple pieces of furniture with an electric wire to create connected interactive furniture. The furniture will work in the same way as interactive furniture, but toggling it will also toggle all neighboring pieces of connected interactive furniture. You can create multi-block toggleable structures, for example large doors.
In the furniture panel in creative inventory you can view and organize your furniture designs. Create named furniture sets to categorize the designs. The newly created designs are placed in "uncategorized" set, which has a special function. Any design in this set, which does not otherwise exist in the world (no items or placed blocks) will be automatically recycled. Be careful and move valuable designs to named furniture sets to avoid accidentally losing them. Each named furniture set can be turned into a furniture pack and exported from the world. You can later import it to other worlds or upload to Dropbox/SDcard and share with others. Furniture packs can also be uploaded to community content.
There are certain limitations to the furniture system:
- A furniture block can be made from up to 16x16x16 sub-blocks.
- The amount of geometry used for a single design cannot exceed 300 triangles (too complex designs with many nooks and crannies are not possible). The game uses an intelligent tessellation algorithm that optimizes the geometry, so 300 triangles is plenty for even fairly complex designs, unless you really go over the top. To reduce number of triangles, you can for example reduce number of small details, reduce number of painted blocks and fill up any internal holes in the design.
- You can only have up to 1024 unique furniture designs in the world. Every time you paint a furniture or combine it with others, you are creating new designs that count towards the total. Unused designs (that do not exist in the world either as items or blocks, and are in the "uncategorized" set in the inventory) are automatically recycled.
- For more information on building furniture, see the Advanced Furniture article page.
Furniture Packs
Furniture pieces are organized into packs. Each pack can hold many different pieces. You can have up to 45 packs loaded in the game. If you try to create or import a furniture pack when you have the maximum amount, a message apears saying "Too Many Furniture Sets".

To work with furniture packs, open the inventory window and choose FURNITURE in the category tab.

There is always a pack called "Uncategorized". This is somewhat like the trash can on a computer - any unused designs left in here long enough will be deleted in time. When you delete a pack in this window all the designs first go into this category. When you first make a new design, it is 'stored' in here.
To add a newly made piece to an existing pack, select UNCATEGORIZED 'pack'. This will show you all the pieces that aren't in a pack. Scroll down the list to find the pack you want to save the new design in, WITHOUT selecting a different pack. Take each piece you want to save and drag the piece from the right side into the furniture pack of your choosing.
At the bottom of this panel is an ADD button to create a new furniture set or pack. This button also lets you import furniture packs from 'content'. This content is stored in the game just like block textures and character skins.
You can do other operations to the furniture packs by selecting the pack and tapping the (. ) button:
This lets you rename the selected pack, delete it from the game, move it up or down in the list, or export it to 'content'. You must first save your furniture pack to content if you wish to move it from one world to another or to upload it to the Community Content. See this page for uploading details.
Description (From Recipaedia)
Crafting is a process of making more complicated items out of simpler ones, using a crafting table or the crafting area.
To craft, you need to place ingredients in the crafting slots in a pattern specific to the item being crafted. All crafting recipes are available in RECIPAEDIA.
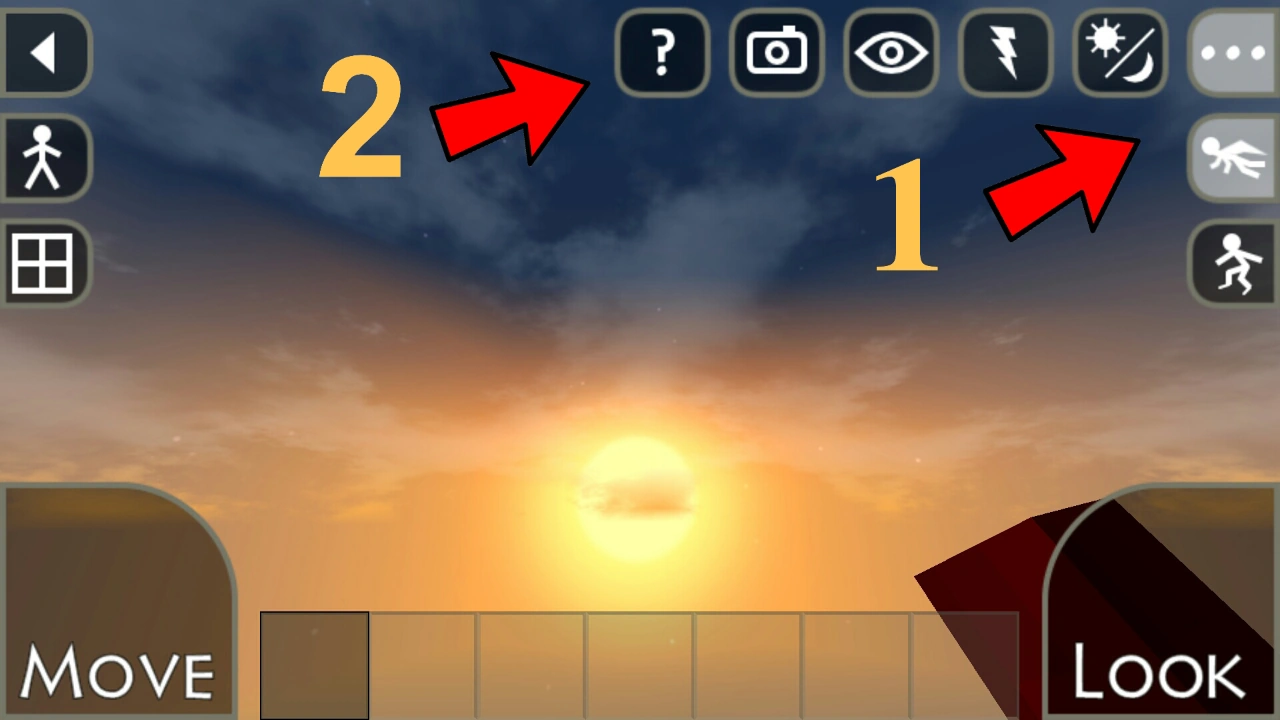
To access Recipaedia during the game. Click on the ". ", then the "?" on the pop out options.
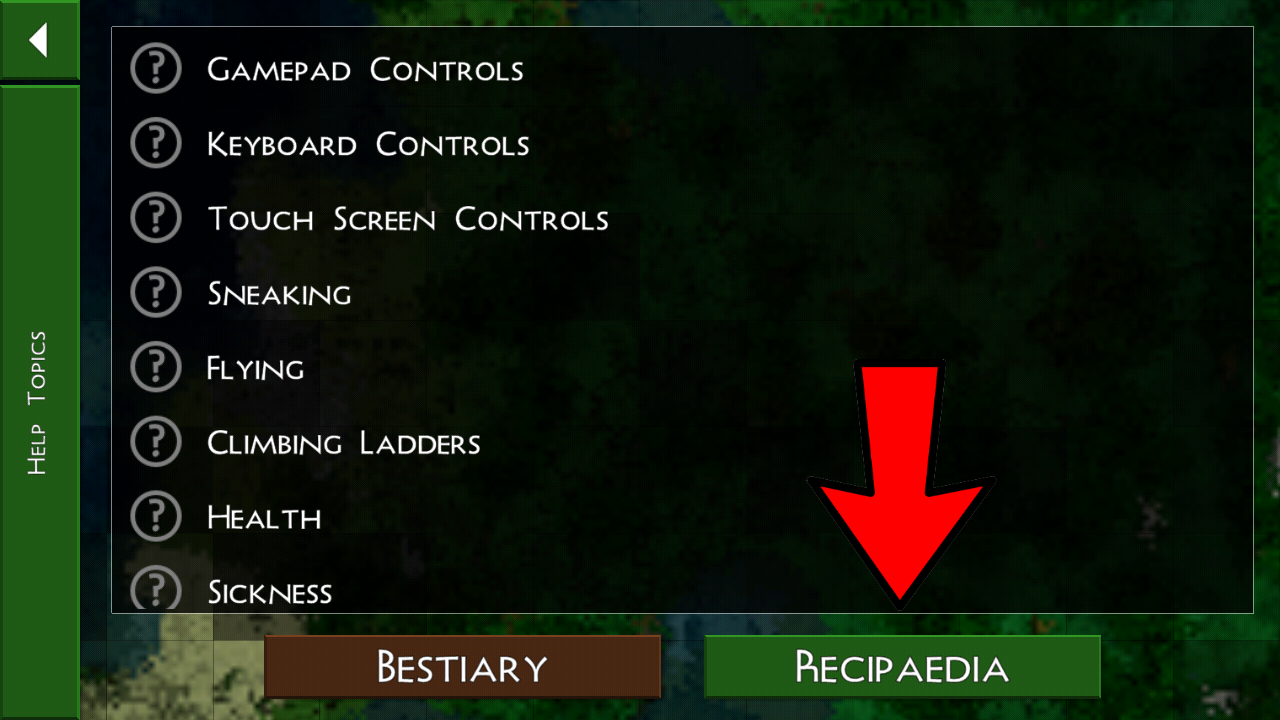
After clicking on the "?", the Help Topics page will come up. Click on the "Recipaedia" button and all descriptions and recipes will be there. You will need to scroll through all of them or click on the various categories to more directly find the recipe you are looking for.
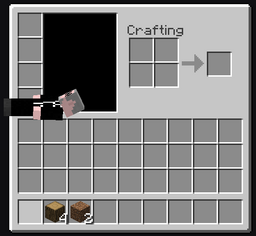
There are two sizes of crafting areas: 2x2 and 3x3. The smaller area is always available and can be accessed by pressing the crafting button. To craft more complicated items on a 3x3 area you need to make a crafting table, place it somewhere in the world and click on it.
You open the personal crafting area by touching the crafting button on the screen. This is the button with the four squares. See the GUI page for more information. You open the crafting table by tapping on it when you are close enough. The crafting window is similar for both. See the pictures below.
The crafting window has two major spaces in it. The left side is the crafting section. The crafting grid is on the top and is either 2x2 or 3x3. The output box is under that. The right side of the window shows your inventory. Drag the materials you need from your inventory onto the specified spaces in the crafting grid.
Be aware that when you are using either crafting area, the game IS NOT PAUSED. You can still be attacked while crafting, so make sure you are in a safe place BEFORE crafting.
Farming
You will need a large crop if you hope to survive on pumpkins. On average, 1/3 of planted pumpkins will NOT mature. Another 1/3 is needed to make seeds for the next crop. So, only about 1/3 of all your plants will be useful as food and those only restore very little hunger.
Pumpkin
Pumpkins are mainly used as a food source. They restore 2 hunger points.
They can also be crafted into Jack O' Lanterns.
They can be crafted into 3 Pumpkin Seeds, allowing you to farm them.
They can be cooked in a Furnace with a Water Bucket to make Pumpkin Soup.
2x2 Crafting
The 2x2 crafting area is also called handcrafting because you do not need a workbench to use it. You can only make rather simple items like sticks, wooden planks, crafting tables, etc.
If your inventory is full, you can even use the 4 slots in the personal crafting area as additional storage. However, you will NOT be able to craft anything here until you remove the stored items from the crafting slots.
Below is an example of the 2x2 crafting table, being used to make a Workbench:
This covers building static furniture using only solid blocks. It describes the basic steps. More complex furniture is covered here.
- Make a (larger) model of the piece. This cannot be bigger than 16 blocks in any dimension. Use only the blocks and items in the list below. Make sure no unwanted block is touching your model. If you build in a created world, this includes the ground as well. That means the ground must be a non-usable block such as grass, or the model cannot touch the ground.
- When it's done, use the hammer on the model to open a UI window:

There are two screens in this window, a control section on the left, plus data at the top. The data tells you how complex the piece is, using 'triangles'. A piece must use no more than 300 triangles to define it. This data tells you exactly how many triangles your piece uses.
The controls section has buttons for viewing the piece, and more. These will be explained below. You can make pieces from different sized models, up to 16x16x16. This is the maximum model size. If your model is smaller than that, you can 'shrink' it to make it smaller than a single block, by adjusting the control at the bottom. If you shrink a single block with this control at 16, then the created block will be 1/16 the length of a single block. If your model is 16 blocks big then you will not be able to adjust this control. The minimum size of the model is 2 blocks. You can make furniture using only 1 block but it will be shrunk to half its dimension. The left screen shows the piece from the view selected in the controls section. You can choose between TOP, FRONT and SIDE views using the top button in the controls. The triangles let you move the piece within the chosen model size and according to the view in this screen. The curved arrows rotate the piece, within the selected view as well. The right screen is a dynamic view so you can see the piece in 3-D. You can hold/drag on this section to rotate the view from any angle. At the top right of this window is a (. ) button. This is used to name the piece you are creating. (You can also use it to rename an existing piece if you 'hammer' the existing piece.)
3. When the piece is positioned and sized as needed, tap CREATE and the UI goes away and the designer block falls from the hammer, and into your inventory. The original model is NOT destroyed in this process if you are in creative mode.
4. After creating the piece, you should add it to a furniture pack. Pieces that aren't assigned to a pack may be deleted by the game. See the next section.
Как сделать кровать в терра фирма крафт
В версии TFC build 76 (MC 1.5.1) добавлена новая система изготовления кожи и ткани.
History
There are two types of beds in TFC. The regular minecraft bed and the straw & hide bed.
Regular Beds [ ]
The regular bed is constructed using lumber, instead of plank blocks, and wool cloth, instead of wool blocks. It works the same way as vanilla Minecraft beds in all other aspects.
Straw & Hide Beds [ ]
This low tier bed is constructed by placing two straw thatch adjacent to each other on the ground, and then using a large hide on the foot end of the straw bed. This bed can only be used to reset the spawn position if killed, and will not allow sleeping through the night. The large hide is dropped by cows, bears, and horses.
Trivia
- If the language is set to Canadian English and the player gets into a straw & hide bed, you get a chat message that says "This bed is too uncomfortable to sleep in, eh?". This is a joke on stereotypical Canadian use of the word "eh."
Straw & Hide Bed
The Straw & Hide bed is created by right clicking with a Large Raw Hide on two adjacent Thatch blocks while standing at what will become the foot of the bed and facing towards the head of the bed.
Usage
Breaking the bed will drop the thatch blocks and raw hide used to create it.
Изготовление кожи
Бочки
Вымачивание
Вам нужно наполнить бочку известковой водой.
Известковая вода крафтится из ведра с водой и флюса. Шаблон:Крафт Залейте раствор в бочку через интерфейс.
С версии 0.79.0 известковая вода создается в бочке, добавлением флюса в чистую воду. На каждое ведро воды нужно две единицы флюса.
Положите в бочку необработанные шкуры и запечатайте её (нажмите на кнопку Seal).
Теперь, пока процесс вымачивания не завершится, бочку нельзя будет открыть.
В итоге в бочке получатся вымоченные шкуры.
Выскабливание
Из вымоченных шкур с помощью ножа нужно сделать выскобленные шкуры. Шаблон:Верстак с версии 0.79.0 шкуры выскабливаются ножом на куске горизонтально(!) лежащего бревна. Для этого нужно горизонтально разместить бревно любого дерева, взять в руки вымоченную шкуру, нажав ПКМ разместить её на бревне, взять в руки нож и нажав ПКМ отскоблить шкуру.
Промывание
Наполните бочку водой.
Положите в неё выскобленные шкуры. Запечатайте бочку (нажмите на кнопку Seal) и дождитесь завершения операции.
В итоге в бочке получатся подготовленные шкуры.
Дубление
Сначала нужно получить танин. Для этого залейте в бочку простой воды.
Теперь положите внутрь бревно, запечатайте бочку и дождитесь завершения операции. В результате вода превратится в танин.
ВАЖНО! Для этого подходят не все виды бревна, нужно использовать один из перечисленных видов: дуб, береза, каштан, пихта Дугласа, хикория, клен, или секвойя.
Теперь положите в бочку с танином подготовленные шкуры и снова запечатайте.
В результате получится кожа.
Рецепты для кожи
Кожа используется для крафта кожаной брони. Поместите нож и кожу в сетке крафта и заберите результат.
После этого откроется специальный интерфейс 5х5, как и в оббивке камней. Шаблон:Верстак
Gallery
First official screenshot of a Straw & Hide Bed released by Dunkleosteus on his twitter account (@TFC_Dunk).
A screenshot of how the player must be positioned and facing to create a Straw & Hide Bed.
Leather
Turning Prepared Hide into Leather requires a Barrel of Tannin. Once filled to your desired amount, place the Prepared Hide into the Barrel and seal it. You will not be able to open the Barrel until the process is completed. Once complete there will be Leather in the Barrel.
Leather Working
To open the leather working interface, right click with Leather in hand and a Knife on the hotbar. This will open up an interface similar to that of the knapping interface.
Crafting
Изготовление шерстяной ткани
Получение шерсти
Теперь при убийстве овец из них выпадает овчина. Из овчины можно получить шерсть с помощью ножа.
Либо шерсть можно сразу собрать с овец при помощи ножниц.
Создание веретена
Теперь добываемая шерсть совсем другая и она не используется для крафта как обычно. Для дальнейшей обработки шерсти понадобится веретено.
Сперва сделайте из глины и палки заготовку прясла. Шаблон:Крафт
Обожгите заготовку на костре (или в печи) и получите прясло.
Соедините прясло с палкой, чтобы скрафтить веретено. Шаблон:Крафт
Пряжа и ткань
Используя веретено вместе с шерстью получите шерстяную пряжу. Шаблон:Крафт
Объедините четыре единицы пряжи и сделайте шерстяную ткань. Шаблон:Крафт С версии 0.79.0 ткань создаётся из 16 кусков шерстяной пряжи, джутовых волокон или из 24 нитей пауков на ткацком станке
Рецепты для шерстяной ткани
Содержание
Configuration
If true then the vanilla Minecraft recipes for creating leather armor are enabled. In addition, a recipe is added for converting TFCraft leather to the vanilla version.
Читайте также: